

It’s no surprise that I love chocolate! I work with it every day, have spent my career teaching people how to use it and will always keep it as my closest ally. It’s versatile, stunning to look at, and tastes incredible.
When people ask me what’s my favourite type, I often say it’s like asking me to choose between children. There’s so many varieties, percentages and origins that only selecting one seems criminal. (If I really had to, I’d lean towards a 67.4% Madagascar dark couverture.)
Though for all it’s amazing applications and abilities, it’s important to note that my beloved hero ingredient can sometimes be a little tricky.
Whether you are tempering, moulding or looking to make a luscious ganache, I hope this guide of handling tips and techniques will help you become the champion of all things chocolate.
Treat your chocolate with care.
If you adore chocolate as much as I do, always treat it with care. Keep your chocolate well sealed and in a cool, dry space as this will avoid it absorbing any moisture. It’s also smart to store chocolate away from strong aromas, as it will easily pick up any strong odour it’s surrounded by.
Tip:
- Always store it in opaque packaging as chocolate has tendency to be affected by light.
Always go with an oil-soluble powder to colour.
Chocolate does not like liquid, so when colouring chocolate, always use an oil-soluble powder. Steer clear of any water-based products as they tend to make chocolate thicken and go lumpy. Similarly, oil-liquid colours reduce the chocolates’ ability to contract, so you can say goodbye to getting a great shine if you decide to use these.
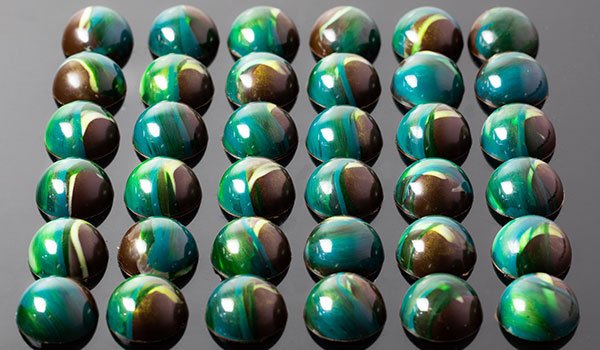
Dark chocolate shines the brightest.
Why? Dark chocolate has the highest percentage of cocoa butter, which is what gives chocolate its beautiful, glossy shine. If you’re thinking about moulding, it’s handy to know that dark chocolate will always produce a shinier finish than milk or white. This is because of the addition of milk powder in milk and white chocolate. Milk powder contains butter which doesn’t set as hard as cocoa butter and so the chocolate doesn’t contract as much. Leaving you with slightly less of a shine.
Moulding tip:
- Apply a thin layer of cocoa butter to your mould, before adding chocolate. This will give your chocolate the ultimate shiny finish.
When to temper your chocolate.
If you’re using chocolate that contains cocoa butter, I guarantee that you’ll have an amazing chocolate experience both in eating and working with it. Generally, if you’re using chocolate with cocoa butter and incorporating it with other ingredients, you won’t have to temper it. If using chocolate on its own, such as for garnishes or chocolate coatings, it will need to be tempered.
P.S. You don’t have to temper your chocolate if it contains vegetable fat…but we probably can’t be friends if you use that.
Now that you’ve learnt a few new chocolate facts, it’s time for the fun part – tempering!
A quick and easy guide to tempering chocolate.
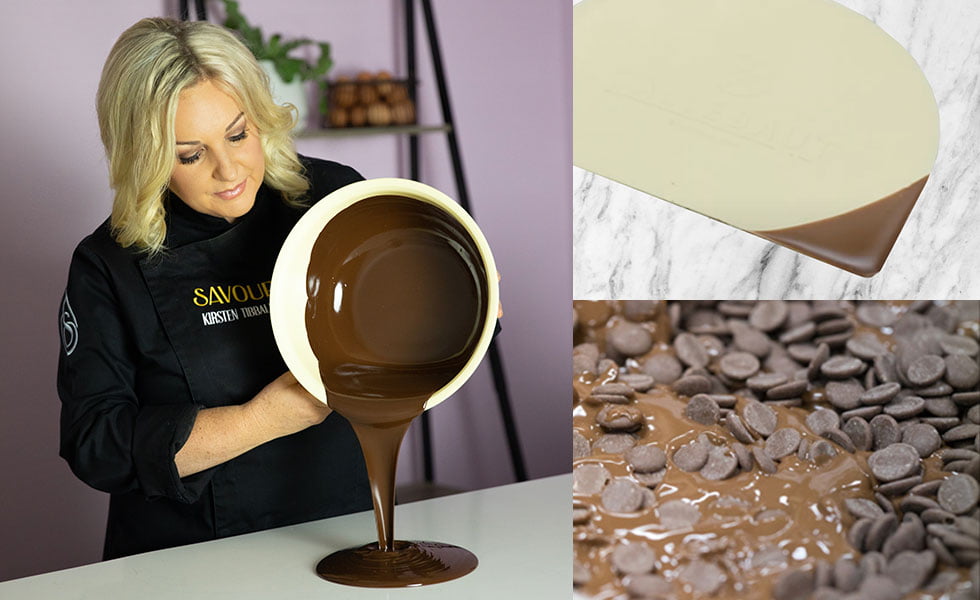
To temper your chocolate, place the chocolate into a microwave-safe plastic bowl, heat in 30 second increments, stirring in between. Once you have 50% solids and 50% liquid, stir vigorously until the solids have completely melted. Do a test on a plastic scraper or piece of baking paper and leave it at room temperature to set. The ideal room temperature for tempering chocolate generally runs between 18-23 degrees Celsius. Note that it will take 10 mins to set for white, 7 mins for milk and 5 mins for dark.
The 3 most important factors to keep in mind are:
- Time – be patient with your chocolate.
- Temperature – both in the heating and cooling stages.
- Movement – a great tempered chocolate requires lots and lots of stirring.
Bonus tips:
- If your tempering test still hasn’t set, re-heat the chocolate in the bowl to 45 degrees Celsius and add 25% chopped chocolate or small buttons.
- If you need to reheat your chocolate after it’s been tempered, I’d recommend using a hairdryer or a heat gun.
Watch out for fat bloom too.
Fat bloom is when the cocoa butter has separated because you haven’t controlled how you heated and cooled the chocolate. The cocoa butter separates and settles on the surface. The biggest issue with this is that the chocolate won’t contract. But don’t worry, this can all be fixed. As long as it doesn’t have a filling in it, you can simply re-temper the chocolate.
How quickly will you need to cool it?
The thickness of your chocolate will determine how quickly you will need to cool it. For example, a chocolate shell for a moulded praline can sit at room temperature to set. In this case, you can wait till you put your filling in and seal it before placing it in the fridge for 20 minutes. Ideally, a larger and thicker piece of chocolate should be placed straight in the fridge to dissipate the heat. Your chocolate cooling process should follow either of these methods.
Use the fridge with moderation.
It can be your chocolate’s arch enemy, so don’t keep chocolate in the fridge for long periods of time. Doing this will create a sugar bloom on the surface! This happens when the chocolate has moisture on the surface and as it dissolves, the sugar crystals in the chocolate reform in larger particles. It will leave you with a sticky and dull surface.