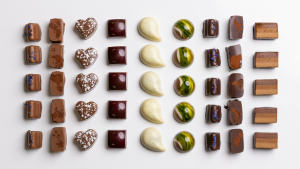
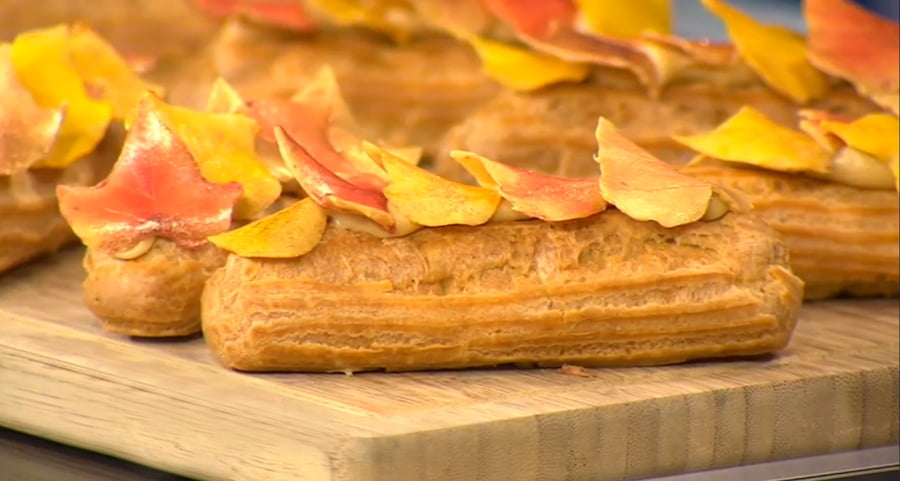


As seen on Studio 10, these caramel eclairs are made using Callebaut Gold couverture and garnished with delicate chocolate leaves.
Makes: 15
Pate A Choux
- 200 ml cold water
- 80 g unsalted butter
pinch of salt - 5 g caster sugar
- 15 g milk powder
- 110 g baker’s flour, sifted
- 175 g whole eggs
- QS vegetable oil spray, for greasing
- QS plain flour, for dusting
- Combine the cold water, butter, salt and sugar in a saucepan and bring to a boil over a high heat. Add the milk powder and while boiling, stir to dissolve.
- Turn the heat off and add the sifted flour in one motion while stirring with a wooden spoon. Turn the heat back on to medium-low and continue to stir until the mixture comes together as a ball and forms a skin at the base of the pot. It can take approximately 2 minutes for small batches, or up to 5 minutes for large batches.
- Transfer the ball of dough to the bowl of a KitchenAid stand mixer fitted with a paddle attachment and mix on medium-low speed for approximately 1 minute.
- Allow to cool slightly and add the eggs in four additions, cleaning the sides of the bowl down with a rubber spatula after each addition.
- Once cool, transfer the dough to a disposable piping bag fitted with a star nozzle.
- Line a tray with baking paper and pipe the choux in a straight line. Spray with an even mist of vegetable oil spray, coating all sides of the choux. Spraying is part of the success of an even éclair – it prevents the surface from cracking.
- Place the choux in the freezer.
- Once hard, remove the choux from the freezer and cut into 12cm long pieces. If necessary, freeze the choux to re-harden each piece.
- Spray a baking tray with vegetable oil and dust with flour. Place the frozen choux pieces on top of the tray. Allow to defrost.
- Preheat the oven to 230°C, place the defrosted eclairs in and immediately reduce the temperature to 170°C.
- Bake for 35-40 minutes.
Gold Chocolate Filling
- 150 g Callebaut Gold Chocolate
- 100 ml Bulla pure cream
- ½ tsp Heilala vanilla bean paste
- 300 ml full cream milk
- 25 g custard powder or cornflour (corn starch)
- 25 g caster sugar
- 120 g egg yolks
- 105 g unsalted butter
- Melt the chocolate in a heatproof plastic bowl in the microwave.
- Boil the cream and vanilla in a saucepan then pour over the melted chocolate. Whisk by hand to combine. This will create a ganache.
- Boil the milk in a saucepan.
- Mix the custard powder (or corn starch) and sugar together in a bowl, add in the egg yolks and whisk together by hand.
- Pour the boiled milk over the egg mixture and whisk together before placing the mixture back into the saucepan and whisking while it comes back to a boil.
- Transfer the mixture to a bowl and slowly add the butter a piece at a time while whisking. Cool to approximately 30°C and add in the chocolate ganache. When all the ganache is added, cover the bowl with plastic wrap and press the wrap onto the surface.
- Allow to cool at room temperature before placing in the fridge for at least 3 hours before using. You can make this filling up to three days in advance and store in the fridge until you’re ready to fill your éclairs.
- Pierce one end of the base of each baked éclair with a metal piping tube or the tip of a small sharp knife.
- Transfer the gold chocolate filling to a disposable piping bag fitted with an 8-10mm round piping nozzle. Pipe the filling into the pierced end of the éclair until it is full. The éclair is best eaten the same day or else the pastry will go soft.
Chocolate Leaves for Garnishing
- 100 g Callebaut Gold Chocolate
- QS pesticide-free ivy, lemon or lime leaves
- QS metallic powder, for dusting
- Melt the chocolate or temper it if it contains cocoa butter. To temper the chocolate, heat it in a plastic bowl in the microwave for 30 seconds at a time until you have 50% liquid and 50% pieces of chocolate. Stir it vigorously without additional heat until all the chocolate has melted. If you have some resistant buttons, you can gently heat the chocolate with a hair dryer while stirring.
- With a small brush, coat each leaf with metallic powder followed by a thin layer of melted chocolate. Ensure you don’t go over the side.
- Scrunch up a piece of foil and place each leaf on the foil to give it natural movement.
- Allow to set in the fridge for no more than 5 minutes.
- Remove each leaf from the chocolate using tweezers or your fingers. The chocolate leaves can be stored in an airtight container for up to 4 weeks.